
This is my original design and now I am posting a little step by step on how to make it.
I call it "Bricks" :-)
Here is a finished one...
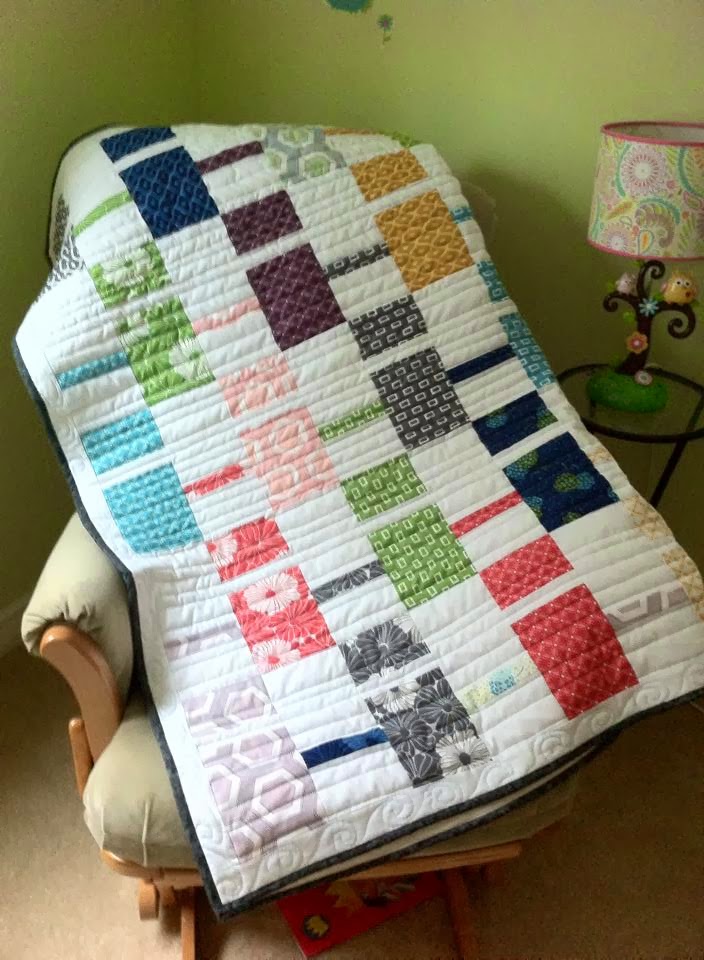

Dimensions: Lap size, 52x62"
and here is the one I am working on now, using a Fiji Batiks layer cake.

This is super easy to put together and I hope you enjoy making your own version :)
What you need:
1 layer cake of the print (for this I am using Fiji Batik)
1 solid layer cake (I like to use white)
extra fabric for binding and back,
If you want to add a border I recommend using the same solid color as the one in your layer cake.
Now, to make it:
Start by cutting your layer cake in half, so you have 2: 5"x10" strips, and then cut each of these into 5 1/2", 1 1/2" and 3" pieces.

Repeat for the solid layer cake.
Now put together the units:
Make the print units by sewing a 5 1/2" piece of print to a 1 1/2" of solid, and then a 3" piece of print.
And the solid units by sewing a 5 1/2" piece of solid to a 1 1/2" of print, and then a 3" piece of solid.
Finished size of each unit is 5" x 9"

Lay the units in rows as shown in the picture.
Alternate between a solid and a print unit, making sure to always position the units as shown, to get the effect of the white lines cutting through the quilt.

Sew the units in rows and then sew the rows together to form the quilt top.
Add borders as desired, sandwich and quilt.
I like quilting this with unevenly spaced, straight lines that go across the quilt.
You get a total of 168 units by using two whole layer cakes. With the addiction of a small border all around this is enough for a queen size quilt!
Thank you for looking!
Let me know if you have any questions and follow me if you want to know next time I post a tutorial :)
No comments:
Post a Comment