Wew! I haven't posted anything here in a long time.
A few weeks ago someone posted a super cute pet bed on Facebook (the idea is a basic puff quilt with sides, to make it more cozy) and I decided I wanted to make some.
This tutorial makes a bed 15" x 11 1/2", this size is recommended for pets up to 15lbs. You can easily adjust the size for your needs by adding more rows of puffs and then adjusting your measurements accordingly. Good luck!
Of course, if you don't have the time or inclination for this kind of project, please contact me and order one. I will personalize it with the name of your furry friend too :)
This is my very first tutorial so please let me know how I can improve it... (and please be gentle)
(Update: There has been a lot of interest (Thank you!) So, until my Etsy store is up and running, I will leave this here... the price for a personalized small bed like the one in these pictures is $75 + shipping, a medium one, with internal measurements of 18"x15" will cost $90 + shipping; any bigger size I would need to calculate my material costs. I will make it to order in the colors you choose and embroider your pet's name on the back panel if you like. To place an order please send me a message or leave a comment and I will contact you.)
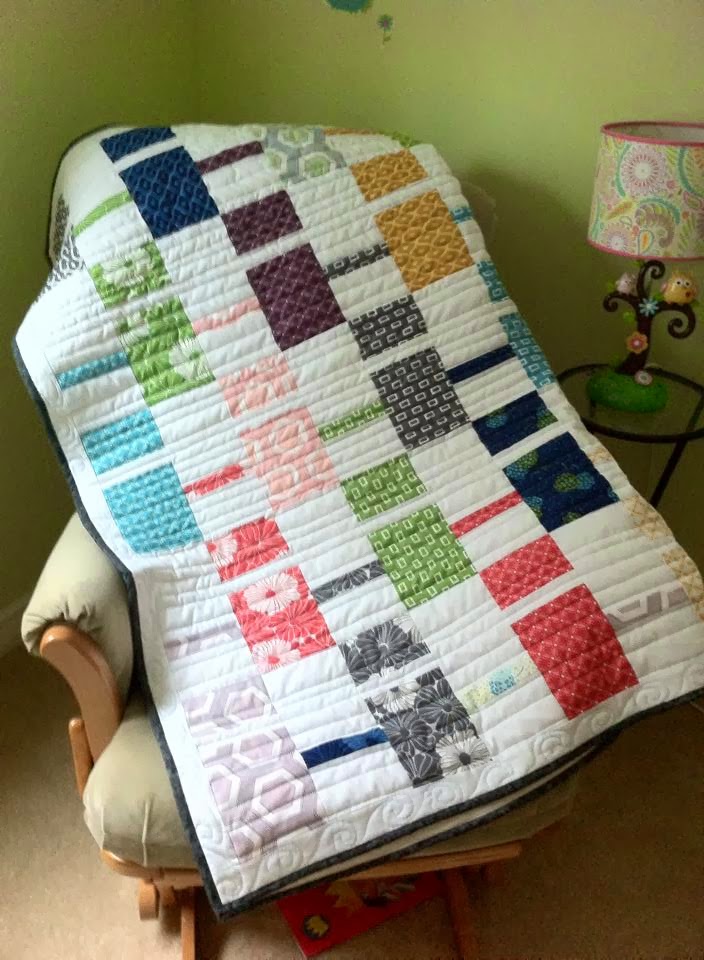
Puff Quilt Pet Bed
So, this is what your pet bed will look like at the end. I think it's so cute! And it looks very comfy too :)
What you need:
For the puff quilt
 - 20 5" squares of your chosen fabric (I am using 5" squares because I wanted this to be charm pack friendly)
- 20 4" squares of any fabric (these will never be seen so you can use any fabric you want)
- 1 16" x 12 1/2" piece of fabric for the back
Filling of your choice for the puffs
- 20 5" squares of your chosen fabric (I am using 5" squares because I wanted this to be charm pack friendly)
- 20 4" squares of any fabric (these will never be seen so you can use any fabric you want)
- 1 16" x 12 1/2" piece of fabric for the back
Filling of your choice for the puffs
For the bed
 - 4 12 1/2" x 6" pieces of your chosen fabric for the side cushions
- 4 16 " x 6" pieces of your chosen fabric for the front and back cushions
- 2 16 1/2" x 13" pieces of fabric for the bottom of the bed (you can use a sturdier fabric for the outside bottom, which will be in contact with the floor)
- 8 pieces of ribbon for the side ties
Filling of your choice for the cushions
- 4 12 1/2" x 6" pieces of your chosen fabric for the side cushions
- 4 16 " x 6" pieces of your chosen fabric for the front and back cushions
- 2 16 1/2" x 13" pieces of fabric for the bottom of the bed (you can use a sturdier fabric for the outside bottom, which will be in contact with the floor)
- 8 pieces of ribbon for the side ties
Filling of your choice for the cushions
You will also need all your basic sewing supplies: thread, scissors, measuring tape, pins, hand sewing needle, etc.
Now for the making of it:
As I said, there are many ways of making a puff quilt (google it, you will see) but I love chain piecing and run away from hand sewing as much as I can, so I did it this way :)
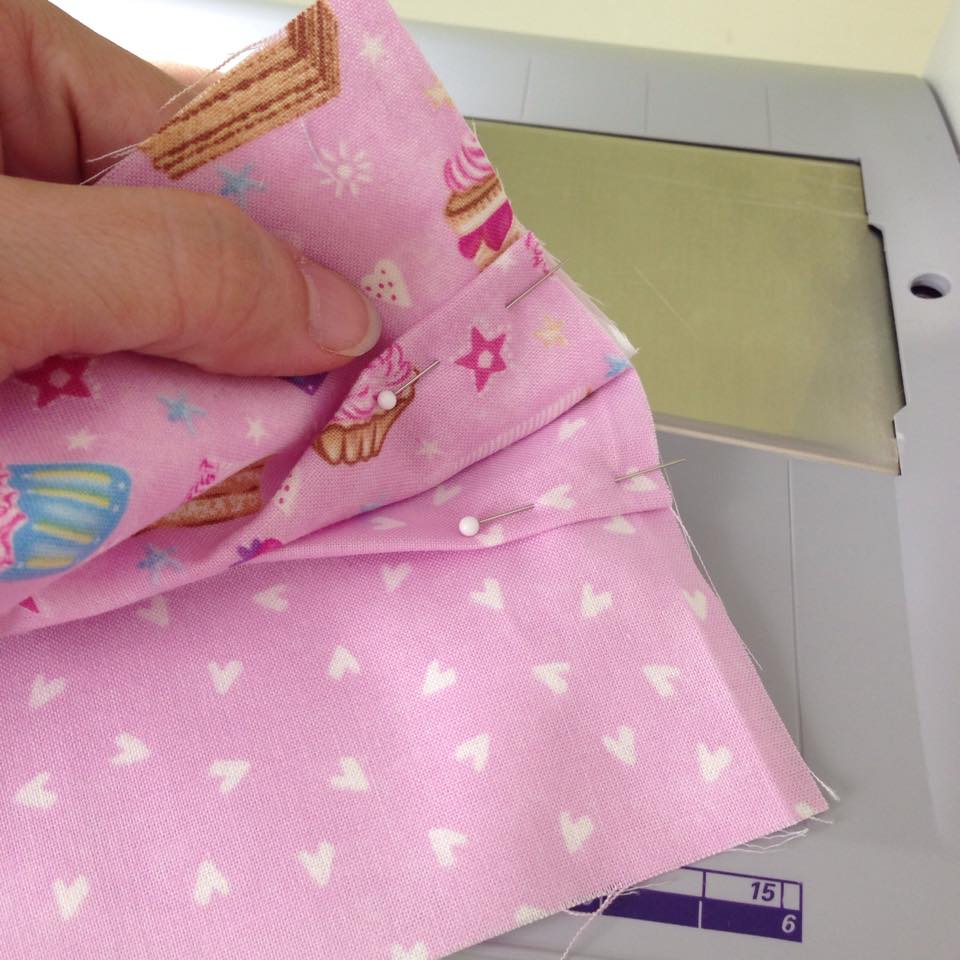
Place one 5" square on top of a 4" square with wrong sides together.
Make a 'pleat' at the center of the 5" square so that it's sides match the 4" square. Pin. Repeat this step on 2 opposing sides of all your 20 squares.
Position one square on top of another, right sides facing, making sure they are aligned. (the pleats don't need to be perfectly centered or match. Once you fill the puffs you cant really tell)
Sew them together on one side (one of the sides that has pleats!) with a 1/4" seam allowance.
Repeat, attaching another square to the last one, 3 more times to form your first row. Sew the beginning and end of the row closed too.
It should look like this when you are done with this step. (for this quilt I am using four rows of five squares)
Now pin a pleat in the middle of the other two sides of each puff. I then top stitched the rows closed individually to make it easier to sew them together, you can skip this step and just leave your pleats pinned in place, but it made life much easier.
Pin two rows together, right sides, facing...
...and sew. Repeat with the other rows.
It will look like this when you are done.
Front
Back
Place your bottom fabric on top of your quilt top, right sides together and sew with a 1/4" seam allowance all around, leaving a big-ish opening on one corner (you will be turning this right side out when the puffs are already filled, so you need some space)
Pinch the bottom fabric away from the top fabric of the puff and cut a small slit on the bottom fabric only.
Fill your puff. I wanted the quilt to be really puffy and with this method you don't have to worry about sewing the sides closed, so I filled my squares to a nice, squishy size.
Hand sew the little opening when you are done filling. Repeat on all squares.
It will look like this :
Turn it right side out, sew the opening closed and you have made a puff quilt! Yay you!
Now for the bed:
To make the 'opening' on the front cushion, cut out a piece 8" long by 2 1/2" high out of the top center of the two front cushion (16") panels, so they will look like this:
Pin and sew your side cushion panels to the corresponding sides of the two bottom panels. Centering them so that you have 1/4" seam allowance on every side.
Repeat for the front and back panels. making sure you do not catch the side panels on the seam.
Press it all open and it will look like this:
Pin the two pieces together, right sides facing, positioning the cuts of ribbon on each of the 8 corners.
Sew all around the perimeter. Remembering to leave openings on all four flaps (to insert the filling later). Turn right side out using one of the openings you left.
It will look like this:
Press it.
Making sure the front and back seams are aligned, sew a straight seam all the way across the bottom of each 'flap', just on the side of the cushion, to close them and keep the filling in.
Fill each of your 4 cushions and then sew the openings closed.
Tie your ribbons together to hold the sides up.
Insert your puff quilt and tuck it in. You are done. :)